Posts

Showing posts from May, 2016

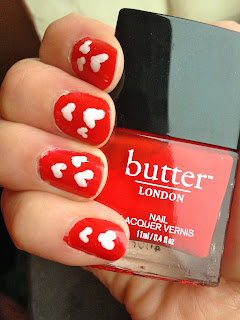
May Favorites: Recommendations

Image
Honestly, I don't have a lot of new favorites this month. I've basically been using a lot of the same products and I have a lot of the same favorites. However, I do have a couple of products that I use regularly that I want to talk about. Age Shield Face Sunblock Lotion SPF 110 with Helioplex by Neutrogena ($13) - This product has been one of my favorites for a long time. I use it basically every day under my makeup as a daily sunscreen (it could also probably work as a daily moisturizer as well). Although I use it every day and I've been using it for a while, I thought it was a good product to mention because it's finally getting sunny outside. (Dare I say it? Summer may be here.) This is my favorite sunscreen because I am very, very fair and I definitely need SPF 110. Not to mention that it doesn't feel greasy on the skin, doesn't have a strong scent, and it works well with my makeup. The texture is also very nice and moisturizing. Even if you don't n

May: A Month of Nail Polish

Image
Last month, I started a series of blog posts about the nail polish I wear every month. So, if you enjoyed embarking on a nail polish voyage with me last month, climb aboard the nail polish cruise ship with me. Ladybird by Butter London and White Out by Sally Hansen - The first manicure I did this month was based on this tutorial I watched about how to create nail art hearts with dotting tools . As you can see, it worked out alright. I struggled a bit to make the hearts neat and they ended up looking a bit like Micky Mouse ears. Ladybird and White Out Black Out by Sally Hansen , Stardust by Butter London , and Petrol by Butter London - This manicure was inspired by Game of Thrones (which is back for Season 6, yay!). I wrote an entire blog about it , but, basically, I wanted to do something that was dark and vampy and inspired by the Night's Watch in Game of Thrones . Black Out, Stardust, and Petrol Honor by Zoya - I picked this polish up on a whim at Ulta (

Reviews: Peanut Butter and Jelly Palette by Too Faced

Image
I picked the Peanut Butter and Jelly Palette by Too Faced in the end of April after I heard a ton of buzz and positive reviews about it. I've been using this palette for about a month and I have some thoughts about it to share with you. First of all, let me say that I was super excited to get my hands on this palette! I love the concept, and I think it's super unique. I mean, it's not often that you see an entire palette of warm toned neutrals. Too Faced has been doing a really good job lately with coming up with awesome ideas, and I'm really impressed with their new products. The idea of a Peanut Butter and Jelly palette is super cute. I love the packaging with the little smiling sandwich; it's absolutely adorable. Plus, I love that Too Faced uses tins for their palettes instead of cardboard . It makes you feel like your eyeshadow is very secure and protected. In terms of formula, this palette is really, really high quality. I believe that the formula of the

Reviews: Creme Gel Liner by Colourpop

Image
As you all know, I'm a big fan of Colourpop , so, when they had a flash sale a few weeks ago, I couldn't resist doing a little shopping. One (or more accurately two) of the things I purchased was Colourpop's Creme Gel Liner , which -- obviously -- is a gel eyeliner . I bought this eyeliner because KathleenLights raved about it in one of her videos. I think it's a decent product. It's not amazing, but it's not bad, and, for the price, it's perfect for every day use. As I said in my last blog about eyeliner ( for the waterline ),  I look for four things in an eyeliner: ease of application, pigmentation, staying power, and -- most importantly -- reaction with contact lens. First of all, this liner is very easy to apply . It's a twist up pencil -- so you don't have to worry about sharpening it -- and the liner is very soft and goes on easily, without a lot of pressing and dragging. However, the application isn't always even. I had to go ove

Reviews: Tres Jolie Gel Pencil Liner by NYX

Image
I'm always on the look out for good eyeliners, especially because I wear contact lens and high end liners tend to smear on contact lens. Recently, I've been hearing Kathleenlights talk a lot about gel liners, and the Tres Jolie Gel Pencil Liner by NYX was one of the liners she recommended, so, I thought, "why not?" and bought it. I like the idea of this liner, but, unfortunately, I found the product itself to be kind of disappointing. First, let me talk to you about the way I evaluate eyeliners (for the waterline, that is).  I look for four things in an eyeliner: ease of application, pigmentation, staying power, and -- most importantly -- reaction with contact lens.  My baseline eyeliner, which I compare other eyeliners to, is Rimmel ScandalEyes Waterproof Kohl Eyeliner . This Rimmel eyeliner is very pigmented, applies easily, and doesn't smear on my contact lens, but it doesn't last all that long. So, I'm always looking for a liner that one-ups

Penn State Inspired Nails

Image
So, I recently graduated from Penn State on May 7th, and, in honor of PSU, I created this graduation manicure. Everyone who saw it loved it and thought that I had gotten a professional manicure (I did it myself). So, you too can save yourself some money and do this simple, cute graduation manicure.   Penn State Nails If you don't know, Penn State's colors are dark, navy blue and white, and our mascot is the Nittany Lion. So, for my manicure, I did a base coat of blue and white paw prints for my accent nail. I started off with my blue base coat. I used the shade Sailor by Zoya , which was the best Penn State blue I could find (obviously, you can use any shade of dark blue you want). I like Sailor a lot because it is opaque in one coat , which cuts down on drying time. After your base coat is completely dry, you're ready to do the paw prints. I used a dotting tool to create my paw prints. Dotting tools are very cheap and versatile , and they are an essential tool i

Reviews: Afterglow Palette by Becca

Image
Okay, total honesty, I've had this palette for a while. I bought it during the Ulta 21 Days of Beauty sale for a reduced price. At first, I was really excited because I'd wanted it for a long time. However, I have to say that I'm actually kind of disappointed with it -- which is why I haven't reviewed it up until this point. I really, really want to like Becca products. I really do. But, to be completely honest, I'm just not impressed with their products. However, that's a blog for another day. Today, I just want to give you some thoughts about the Afterglow Palette. The Afterglow Palette comes with three Shimmering Skin Perfectors (in the shades Moonstone, Rose Gold, and Topaz) and two Mineral Blushes (in the shades Wild Honey and Flowerchild). My biggest complaint about this product is the packaging . As you can see from the picture, there are five pots of product in a rectangular case. What you can't really see in the picture is how small the pot

Game of Thrones Inspired Nails: Targaryen Edition

Image
So, last week I wrote a blog about a Game of Thrones inspired nail look and people seemed to like it, so I decided to do a follow up blog with my Game of Thrones nails for this week. This week's nails were inspired by House Targaryen because I love Daenerys Targaryen and she always looks fierce -- even when she's been walking through the dessert for weeks. I created this nail using a very simple gradient technique . Because House Targaryen's colors are black and red, I did a black and red gradient. Before you start, you'll need a wedge shaped makeup application sponge . You can buy bags of these sponges at drug stores or cosmetic stores. They're very cheap. Using scissors, trim a sponge so that the thick end is the size of your largest nail. To start out, I painted a latex barrier around my nails. If you don't know, latex barriers (also known as the peel off stuff) are very useful for messy nail art -- and gradient nails are messy nail art. Yo

Game of Thrones Inspired Nails: Night's Watch Edition

Image
So, if you've been reading my other blog, you know that I'm a big fan of Game of Thrones and I'm super excited that it's back for season 6. For this week's episode, I decided to do a Night's Watch inspired manicure because I had a feeling (and I was correct) that important things were going to happen at the Wall in this episode. Anyway, I started off with two coats of black polish because, of course, the Night's Watch wear black. I used Sally Hansen's Black Out , but you can use any black polish you have. It doesn't have to be anything special, just basic black. Next, I applied a holographic top coat over four of my nails. I used Butter London Stardust , which has a nice rainbow effect, but any holo top coat will do. The rainbow holo reminds me a bit of the way light reflects on snow, which seemed very appropriate for Jon Snow. (Who is definitely my favorite reanimated corpse). For my accent nail, I just put a coat of Butter